Friday, November 28, 2014

Learning to use a sewing and embroidering machine

We are trying to turn our basement into a mini makerspace for the kids.  Quite a few years ago my wife bought a fancy sewing machine that does embroidery which I thought would make a fun addition.  My eldest daughter and I got playing with the machine and it is quite amazing.  In no time at all we were able to embroider a bow and make a cute little pillow.  I look forward to seeing what we will make next time.

- Dirk


Fairy House

Over the summer we spent some time up at our Aunt and Uncle's cottage.  Kids were picking up a lot of nature detritus to "keep" and my wife got the idea to make a Fairy House.  Turned out to be a really fun project.  I particularly like the paper lantern made from an old hornet's nest and the ladder.  The trick seems to be start with the big stuff and keep filling in the details until it looked right.  

- Dirk


Monday, September 1, 2014

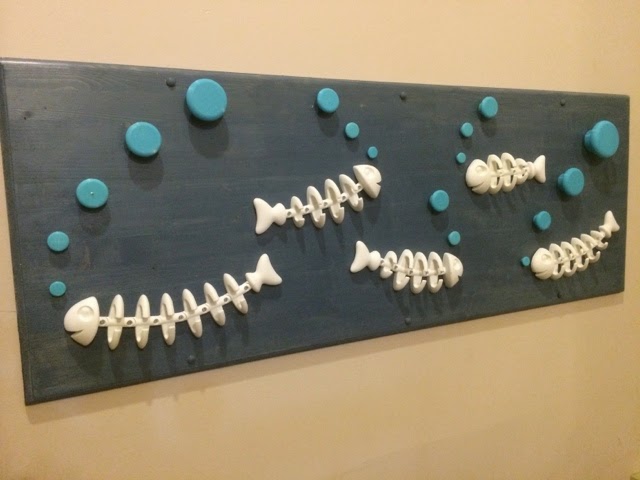
Fish Tank Kids Coat Rack

This one was a lot of fun.  We have a coat area down by the back door landing.  I used those plastic hooks with the special double sided tape that allows you to remove the hooks without damaging the wall.  Unfortunate, the kids managed to pull the hooks off taking some paint and drywall with them. 


Anyway my plan was to print put some new hooks using my 3D printer.  I thought this would be the "cheap" way to  go.  I let my imagination get away with me and ended up with something a little more expensive but also something unique.

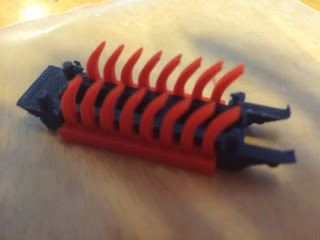
The design is quite simple and consists of two hooks I found on thingiverse; a fish:


And a round hook or bubble:

http://www.thingiverse.com/thing:52764


The overall affect is a fish tank with a bunch of fish skeletons swimming around.


The design is a little odd bit visually appealing and has a ton of places for the kids to hand stuff.

- Dirk


Monday, August 4, 2014

Vacation fort

We are spending time with the kids at our aunt and uncle's cabin in northern Michigan.  This is an old hunting cabin but it is not exactly roughing it.  There is air conditioning and internet.  

I am worried that the kids are spending too much time inside on the devices.  At some point yestuday I banned the devices and told my eldest to go out and build a fort:


She found some old ladders ready for the burn pile and built from there.


The fort turned out really well.  It is surprisingly strong and all of the kids are proud of what they built.


It is also a fun place to picknick lunch out of the hot afternoon sun.

- Dirk


Saturday, July 19, 2014

Bug bots

I like the simple fun of bushbots; little robots, typically made with toothbrush heads, that use a cell phone vibrating motor to scoot around a table (you can buy kits here: http://www.makershed.com/products/brushbots).  I decided that this would be a great project for me to do with my kids.  Step one was to find the parts.
  1. Cell phone motors (pack of 50). 
  2. Batteries. Large pack ordered on amazon: http://amzn.com/B0043SAFK0
  3. Glue
  4. Double sided tape
  5. Toothbrushes
Between the motors and batteries, the price per brushbot was getting expensive.  So Instead of buying a bunch of toothbrushes I decided to see if I could print the body instead.  I came across the following design on thingiverse that did exactly what I wanted:


I ended up using only the "legs" and the body.  I also think it was also better to assemble the body upside down. In any case, I was able to print out these three parts and just let the kids assemble them using superglue:
Then we had to strip the wires for the motor (probably the trickiest part) and remove the sticker cover on the motor to stick it to the "bug".  
Add small pieces of double sided tape and lay down one of the wires on the tape. Then have the kids stick the battery on top of the tape and use a second piece of tape to secure the top wire. 
At this point the bug bots should start dancing.  We used an upside down paper plate as a "sumo" rink to see which bug bot could stay on the longest.  
Overall this activity was easily complete in 15 minutes and the kids had something to take home with them.  Special thanks to ekaggrat at thingiverse for posting his 3D designs which made this project possible.

- Dirk

Coffee table drawer

The kids have really done a number on our living room coffee table.  The top has been "distressed"  by biting, thrown toys and lots of drumming.
The drawers have also been used as steps to get up on top of the table.  Most of the hardware components have broken under this level of used.  
I decided that this would be a fun project for my 3D printer.  There are a lot of drawer guides in thingiverse. I downloaded a few drawer guild stl files but none of them really fit my dawers:


I ended up having to design my own using a pair of calipers and OpenScad.  I think they turned out great:


I also replaced 3 of the four drawer stops using another design developed in OpenScad:

After the flat part was printed I put it in a warm pan on the stove to soften the plastic a little so I could put an appropriate bend in it. Here is a link to my files if you are interested in working with them:


I also posted them on YouMagine.org


Overall, I am happy with the results.  And I am comforted in knowing that I can replace the parts again if the kids get destructive again.

- Dirk

BackBlog - Teleporter video

We through a Star Trek themed surprise party for my wife and I thought it would be fun to see if I could make a transporter effect.
To start we took two pictures, one with everyone in an away team formation and one with just the background

I then wrote a simple program to add the two images together using a weighted sum.  This technique looked okay but I also wanted some noise.  I used the matlab imnoise function to create some sparkles. Inicially just a few, grow to a lot about halfway and then disparate as the people materialize.  

The trick is to get the speckles to only appear where there are people.  I could have tried some clever image subtraction trick to find the region that changed but it was just as quick for me to use GIMP to cut the people out and make a simple flag array using the following Matlab code.  I had to also use GIMP to paint over any white spots in the image. Fortunately for my image there was very little white. I ended up with the following (I guess I could also have just select the white and set everything else to black).


Now, potting All the components together and looping from 0 to 100 I was able to create a directory of images that I wanted and stitched the images together using ffmpeg.

To top it off,  I found a transporter like sound on the net and used my copy of Camtacia (http://www.techsmith.com/camtasia.html to put the audio and video together.
Here is my final product:


- Dirk